Powered By Blogger

Wednesday 30 March 2016

Make your own diaper case


What you’ll need to make all 3 things:

1/4 yard of fabric of each of the two colours

1/2 yard lining, any color you like
1 empty wipes case
felt
sewable velcro
ribbon/embellishments for wipes case
thread
hot glue gun
sewing machine
scissors
 
***Adjust quantities if you only want one diaper case.
***Also, measure your fabric and decide where you’re going to cut what, before cutting. You don’t want to waste fabric.

First of all, I am using the Huggies brand diaper wipes portable case. (If you can’t find any at your local stores, here’s a LINK to some on Amazon.) Measuring along the top, down to the middle of each side, I decided that I needed pieces of fabric that were 9 x 5 inches. So the diaper case, if you’re not sewing strips together, is pretty fast and simple. Just cut out a piece for the top and bottom that are 9 x 5 inches and then skip the next part.

If you do want the strips, cut 3 pieces of 2 x 5 inch rectangles, in each color. So you have 6 strips total. Sew them together, using a 1/4 inch seam. Iron flat.

Now, cut out 2 pieces of felt that are 9 x 5 as well. Glue your piece of felt to the top of wipes case, being sure to center it in the very middle of the piece of felt, and then trim around the felt. The felt doesn’t need to go down the sides at all. It serves its purpose of covering up that center opening thingy (you know what I’m talking about?) and makes the top slightly softer. Also it hides the glue marks. Then hot glue your top piece (your stripped together piece or your plain one) on top of the felt.

TIP: Just glue a little bit at a time so that your glue is nice and hot while attaching the fabric to the felt, creating a secure hold. Trim this fabric as well, but a little longer, making sure that it almost reaches the middle of the sides. Do the same thing to the bottom.

And it’s okay if it’s not perfectly straight or doesn’t line up with the middle exactly. See look, here’s mine. Don’t try to perfect this part…..it’ll get covered up anyway.

Then attach a wide piece of ribbon to the top, making it just as long as the fabric. Then glue some thin ribbon around the upper and lower edge, hiding all of those edges of fabric (and your ends of wider ribbon). Take your time and only glue a little at a time, to make sure your are attaching your ribbon to HOT glue. This will help it stay in place permanently. Just don’t burn those little fingers. Ouch.

I started and finished at the back, to hide the ends.

Oh yeah, glue (or you could hand stitch) some embellishments to the top. I added a fabric yo-yo from this project and a button. I’ve realized you can use these little yo-yo’s on anything. Cute.

How to Make a Father’s Choice Quilt Block


How to Make a Father’s Choice Quilt Block

This beautiful quilt pattern features the ‘Father’s Choice’ quilt block, a historical quilting block pattern that has its origins in the tradition of barn quilts. Made using ombre fat quarters, it gives the quilt a wonderful colour finish to accent your bedspread.

How to Make a Father’s Choice Quilt Block

You Will Need

Craft Essentials


How to Make

1. Start by cutting contrasting fat quarters into 2 ½ inch wide strips.
How to Make a Father's Choice Quilt Block #quilting #star #beginner
2. From the strips cut a 2 ½ inch square and then 4 x 4 ½ inch strips.
How to Make a Father's Choice Quilt Block #quilting #star #beginner
3. Sew an uncut two and a half inch strip from each fat quarter, along the length using a ¼ inch seam.
4. Open and press the sewn strip then cut it into rectangles two and a half  inches wide.
How to Make a Father's Choice Quilt Block #quilting #star #beginner
5. Sew the rectangles to another two and a half inch strip and press, then cut them into larger squares.
How to Make a Father's Choice Quilt Block #quilting #star #beginner
6. You should have several large squares with a contrasting smaller square in one corner.
7. Cut another strip into two and a half inch squares and sew them to the larger square as shown. This will create a chevron pattern once the excess has been trimmed and pressed.
How to Make a Father's Choice Quilt Block #quilting #star #beginner
8. To assemble the block you will need, four of the larger chevron squares, four of the two colour strips and a two and a half inch square for the centre. Refer to the photo for the arrangement.
How to Make a Father's Choice Quilt Block #quilting #star #beginner
9. Sew all of the pieces together using a quarter inch seam and press. I find it easier to sew the rows together and then join the rows once I’ve pressed the pieces.
How to Make a Father's Choice Quilt Block #quilting #star #beginner
10. You may need to square the block once you have sewn it all together. If you choose to do this then make sure you check their sizes as you go.
11. The design for the quilt is entirely up to you. I chose to use a simple block in-between the starts so that it didn’t look too busy. This block was made using four by four half inch squares joined with a spare two and a half inch strip in the middle.
How to Make a Father's Choice Quilt Block #quilting #star #beginner
12 Decide how large you would like your quilt, if you have the space it’s helpful to lay out the blocks as you make them so you can see how you’re getting on. Once you are happy with your design, sew the blocks together using a quarter inch seam.
13. You should now have a finished quilt top. Check out my other post for a guide on how to sandwich it together.
14. Once you have sandwiched your quilt, you can either use a free motion technique to finish it or ‘stitch in the ditch’.
15. Trim the edges so that the wadding and backing fabric don’t overhang. Then attach bias binding to the outside edge. There are a couple of ways to do this, you can either make your own with a bias tape maker (or just use and iron), or you can buy pre-made tape.
16. Once you have finished your binding you have completed the quilt.
How to Make a Father's Choice Quilt Block #quilting #star #beginner

Free Knitted Cable Bonnet Pattern

Free Knitted Cable Bonnet Patternhttp://blog.hobbycraft.co.uk/free-knitted-cable-bonnet-pattern/#craft #knitting #kknittngpattern #babypatterns #freepattern #craftblog #craftblogger #ukblogger #lblogger

Posted by Handmadelittlecreations on Wednesday, 30 March 2016

Tuesday 29 March 2016

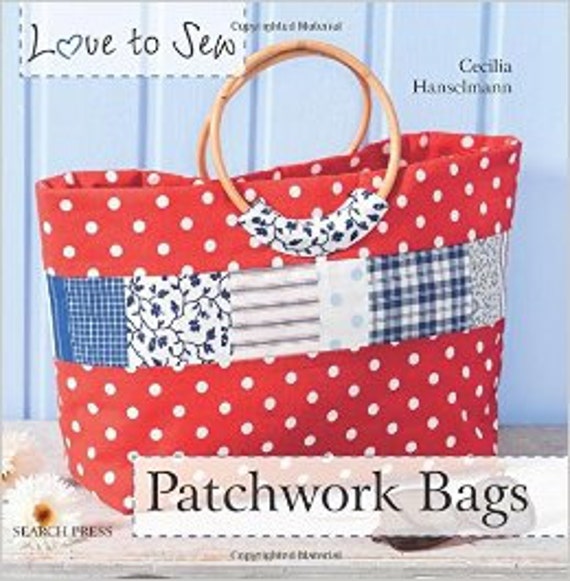
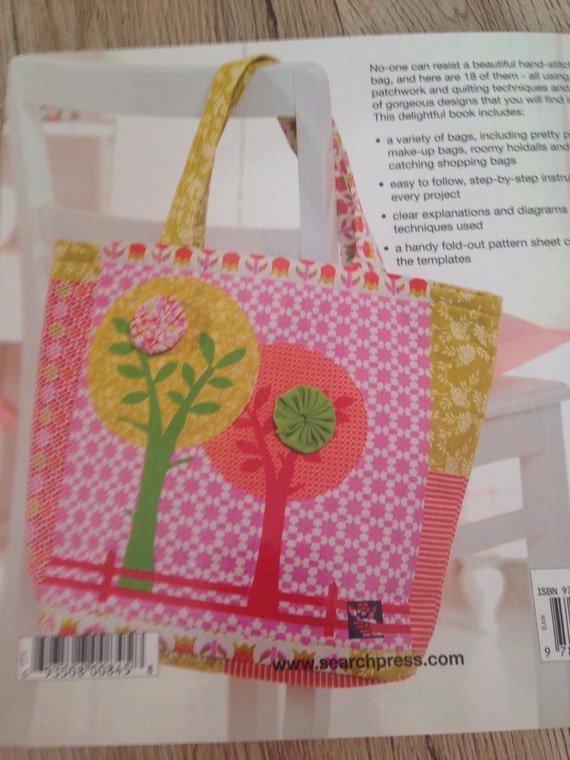
Learn to make patchwork bags


Patchwork bags by Cecilia Hanselmann - Fabric Craft, Textile Craft, Bag Making, Learn to Craft

Buy the book below... from my Etsy craft book store


Sewing is popular with all ages and this series, Love to Sew, focuses on the latest hot trends. The 64 page handy square format gives us room for twenty projects, each with simple step-by-step instructions, beautiful photographs, as well as sewing techniques. We all use bags. 

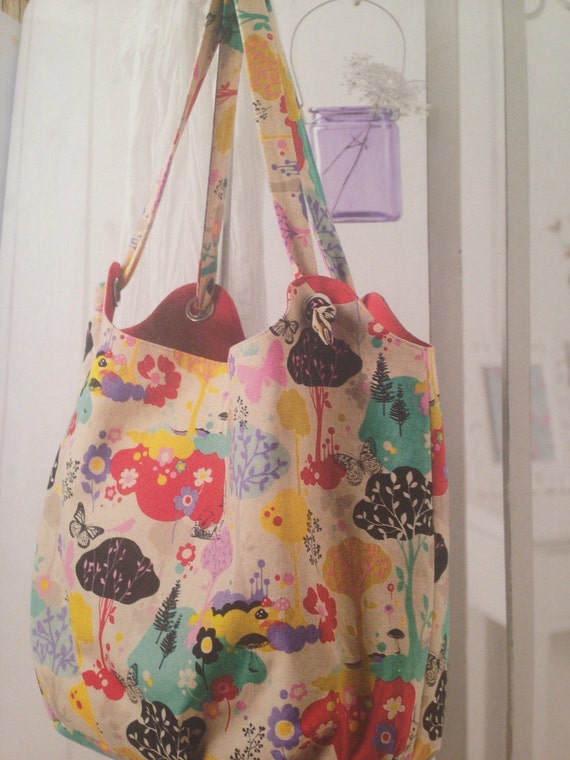
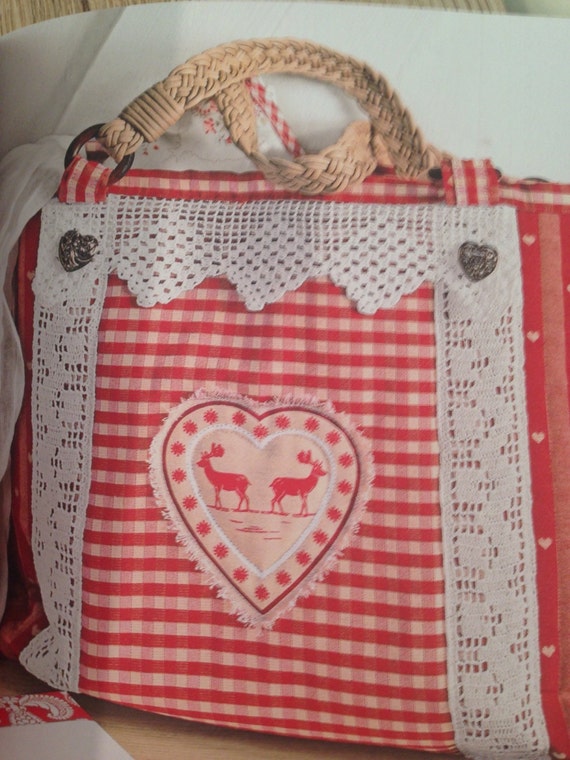
They are not only highly useful but those you make yourself can be real head-turners and say something to the world about who you really are. This book contains a wide range of patchwork designs to choose from, many suitable for beginners or those with limited sewing experience. 

Whether you like the retro look or something more playful or romantic, there is something for everyone! There is a bag for every occasion too a city bag, shopping bag, clutch bag, travel holdall, purse and more.

Table of Contents

Introduction 6
Sewing Basics 8
Sewing Techniques 12
Machine Applique 16
Projects 18
Stitches 60
Templates 61
Index 64


Take a flight of fancy with this cute little patchwork owl

Take a flight of fancy with this cute little patchwork owl that is an easy project for beginners into needlecraft
Owls are perennially popular, so he’d make a wonderful gift for someone special, unless you couldn’t bare to part with him of course! All you need to get started is some thread, fabric, needles and buttons – most of which you’ll probably find lying around the house.

Patchwork Owl

Time to make : Around two hours
Suitable for : Beginner

What You Need

  • Calico owl shape
  • Fabric
  • Buttons
  • Pinking shears
  • Needle
  • Embroidery threads

How to Make

  1. Start by choosing the fabric and the buttons that you want to use to apply to the stuffed owl.
  2. Cut 1 cm wide strips of your chosen fabric using pinking shears.
  3. Starting at the bottom of the owl stitch on the fabric strips using a whip stitch.
  4. Continue to layer the fabrics, working up the body to the top of the owl slightly overlapping the fabric strips as you go.
  5. Once the whole of the front of the owl is covered in the fabric strips, repeat the process on the back of the owl.
  6. Using the stuffed owl base as a guide, cut the strips to the shape of the owl using pinking shears.
  7. Apply the buttons for the owls eyes and the beak by hand stitching them on, making sure to go through the calico base fabric as well as the top layer of fabric.
  8. Using embroidery threads, embroider two wing outlines using a continuous running stitch.

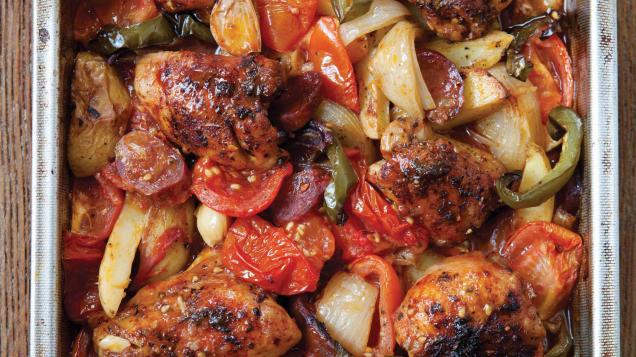
This great one pot chicken recipe has no added fat and a spicy kick from the chorizo By Hairy Bikers


  • Rating: 
  • Serves: 4
  • Cook Time: 
  • Prep Time: 30 minutes 
  • Effort: easy

  • INGREDIENTS

    • 1 medium onion, cut into 8 wedges
    • 1 medium red onion, cut into 8 wedges
    • 500 g new potatoes, quartered lengthways
    • 8 whole garlic cloves, unpeeled
    • 8 medium tomatoes, quartered
    • 75 g chorizo, preferably picante
    • 8 boneless, skinless chicken thighs
    • 1/2 tsp sweet, smoked paprika
    • 1/2 tsp dried oregano
    • 1 green pepper, deseeded and cut into strips

    METHOD

    1. Preheat the oven to 200C/180C fan/gas 6. Put the onions, potatoes, garlic and tomatoes in a large roasting tin and season with sea salt and lots of freshly ground black pepper. 

    2. Toss everything together lightly and roast for 20 minutes. 

    3. While the vegetables are roasting, skin the chorizo and cut the meat into thin 5mm slices. 

    4. Put the chicken thighs on a board and carefully slash each one 2 or 3 times with a knife. Season all over with black pepper. 

    5. Mix the paprika and oregano together and set aside. 

    6. Take the roasting tin out of the oven, scatter the chorizo over the veg and turn everything a couple of times. 

    7. Place the chicken on top of the vegetables and chorizo and sprinkle with the paprika and oregano. Season with a little salt and return to the oven for 20 minutes. 

    8. Take the tin out of the oven. Holding one corner carefully with an oven cloth, lift the tin a little so all the juices run to the opposite end, then spoon and drizzle the juices back over the chicken. 

    9. Tuck the pepper strips loosely around the chicken and vegetables. 

    10. Turn the oven up to 220C/200C fan/gas 7. Put the tin back in the oven for another 20 minutes or until the peppers are just softened and the chicken is golden and crisp. 

    11. As you eat, squeeze the garlic out of the skins and enjoy the deliciously soft and fragrant flesh. 

    How to Make a Fat Quarter Turtle


    How cute is this little fella? Perfect for beginners to patchwork, a fat quarter turtle is guaranteed to bring smiles all round as you all give him a little cuddle on the sofa!

    How to Make a Fat Quarter Turtle

    Skill Level: Beginners
    Time to Make: 4-6 hours

    How to Make

    1. First of all print off the templates onto thin card – paper will work, but thin card will give more stability. Cut out all the pieces with your paper scissors (Never use your fabric scissors to cut anything but fabric)
    2.Take the Hexagon template with “Shell Centre” written on it, and cut out one piece of fabric approximately a centimetre larger all the way around as shown in the photo.
    How to Make a Fat Quarter Turtle #sewing #beginner #fatquarter #project
    Using the contrasting thread tack the fabric (right side out) to the card using large tacking stitches.
    How to Make a Fat Quarter Turtle #sewing #beginner #fatquarter #projectHow to Make a Fat Quarter Turtle #sewing #beginner #fatquarter #project
    3. Take the odd shaped Hexagon with “Shell Edge” on it, and do the same as step two with different patterns of fabric. The arrows on this piece all need to be pointing to the main first hexagon for joining.
    How to Make a Fat Quarter Turtle #sewing #beginner #fatquarter #projectHow to Make a Fat Quarter Turtle #sewing #beginner #fatquarter #project
    4. Now take one of the six pieces, and making sure the arrows point to the main hexagon, place the pieces front side to front side and sew in place using the matching thread and tiny stitches. Make sure you just sew the fabric and not through the actual card as it will be harder to remove later.
    How to Make a Fat Quarter Turtle #sewing #beginner #fatquarter #project
    Repeat with all the other pieces so that all pieces are joined to the main hexagon as shown.
    How to Make a Fat Quarter Turtle #sewing #beginner #fatquarter #project
    5. From the centre hexagon ONLY, remove the taking stitches and gently pull the card away.
    How to Make a Fat Quarter Turtle #sewing #beginner #fatquarter #project
    This mean you can now bend your work in half to sew the edges of the second row together.
    How to Make a Fat Quarter Turtle #sewing #beginner #fatquarter #project
    Do this all the way around.
    How to Make a Fat Quarter Turtle #sewing #beginner #fatquarter #projectHow to Make a Fat Quarter Turtle #sewing #beginner #fatquarter #project
    6. Using the small Triangle template with “filler” on it, prepare 6 pieces of patchwork the same way you have just done with the hexagons.
    How to Make a Fat Quarter Turtle #sewing #beginner #fatquarter #project
    Sew them in place into the gaps around the bottom of the shell. Then remove all the tacking stitches and the card.
    How to Make a Fat Quarter Turtle #sewing #beginner #fatquarter #project
    7. Now prepare all your other pieces. Cut one Circle, two heads, eight feet and two tails out of your chosen fabric.
    How to Make a Fat Quarter Turtle #sewing #beginner #fatquarter #project
    Place the head pieces together right side to right side and using a sewing machine, or by hand if you prefer, sew around, leaving the neck open for turning and stuffing. Repeat with the legs and tail – remembering to leave the edge open for turning and stuffing.
    How to Make a Fat Quarter Turtle #sewing #beginner #fatquarter #project
    Turn and stuff the pieces.
    How to Make a Fat Quarter Turtle #sewing #beginner #fatquarter #project
    8. Using the contrasting thread, tack the head to one of the hexagon edges – facing inwards as shown in the photo. Tack the tail to the opposite one, then tack the legs to the ones in-between. These stitches will be removed later.
    How to Make a Fat Quarter Turtle #sewing #beginner #fatquarter #project
    Take the circle and lay it face down on top of your work, pin it in place. Tack it all the way around.
    How to Make a Fat Quarter Turtle #sewing #beginner #fatquarter #project
    Using your sewing machine, or by hand, sew all the way around the circle making sure you leave one of the “filler” triangle sections un-sewn so you can turn your work the right way in.
    How to Make a Fat Quarter Turtle #sewing #beginner #fatquarter #project
    9. Turn your Turtle the right way out (you may need to squash his head a little to get it through the gap) and check all limbs are sewn on and there are no missed bits.
    How to Make a Fat Quarter Turtle #sewing #beginner #fatquarter #project
    Stuff your turtle and hand sew up the gap with neat stitches.
    How to Make a Fat Quarter Turtle #sewing #beginner #fatquarter #project
    10. To keep the head in an upright position add a tacking stitch to the back of the shell and the head, this will pull it in tight to the shell.
    How to Make a Fat Quarter Turtle #sewing #beginner #fatquarter #project
    Finally add the eyes. I used two buttons for each eye to give it a 3D effect, but you could embroider them on if you prefer.

    How to Make a Fat Quarter Turtle #sewing #beginner #fatquarter #project
    How to Make a Fat Quarter Turtle #sewing #beginner #fatquarter #project

    How to make a kissing ball / pomander


    Kissing balls are a beautiful alternative to fresh flowers on your wedding day. Foam flowers are much cheaper and just as pretty, and you can create a stunning floral arrangement in no time at all – give it a go!

    How to Make a Kissing Ball

    You Will Need

    Craft Essentials

    • Cool melt glue gun »
    • Wire cutters »
    • How to Make

      1. To start, cut your wired roses leaving about 1cm of wire from the head, as this will help place the roses into the polystyrene ball more securely.

      Top Tip! . . .

      Most polystyrene balls have a join around the middle of the ball. This is great to use as a start guide when gluing your flowers. 
      2. All the way around the middle of your ball, place your flowers into the polystyrene. Once happy with the spacing of the flowers, use your glue gun to glue in place.
      3. Repeat step 2, placing more flowers above and below the first line of flowers securing with a glue gun. Fill the ball until you are left with a small space at the top.
      4. To hang the kissing ball take a piece of ribbon and fold it in half, using a pin to collect the two ends of the ribbon and place into the top of the polystyrene ball. Glue to secure.
      5. Once your ribbon is secure, place your last flower next to the ribbon to hide the join.
      6. To add detail to your kissing ball, use wired crystals randomly placed in between the flowers. Use the wire they’re on to place into the polystyrene ball and glue into place.

      Top Tip! . . .

      For optional detail, you can place beads into the centre of some of your roses. Pearls and crystal beads look great for this, and you can glue them in place with your glue gun.